Dactyl Manuform build log
Bill of Materials
- Arduino Pro Micro (x3 for $9.60): https://www.aliexpress.com/item/3pcs-Pro-Micro-ATmega32U4-5V-16MHz-Development-Board-With-3-Row-Pin-Header-for-Arduino-Leonardo/32952028063.html?spm=a2g0s.9042311.0.0.493f63c0O9ucMa
- Female RJ-9 connector (x10 for $1.36): https://www.aliexpress.com/item/10-Pcs-616E-4P4C-RJ9-Female-Telephone-Connector-Adapter-w-4-Wires-8cm/4000827770199.html?spm=a2g0s.9042311.0.0.493f63c0O9ucMa
- RJ-9 cable (x1 for $1.37): https://www.aliexpress.com/item/CNIM-Hot-Replacement-RJ9-4P4C-Plug-Coiled-Stretchy-Telephone-Cable-Black/32766567777.html?spm=a2g0s.9042311.0.0.493f63c0O9ucMa
- Blank Keycaps (108 key set for $11.94): https://www.aliexpress.com/item/108-Keys-Pbt-Dolch-Keycap-Top-side-Printed-For-Mechanical-Keyboard-Full-Set-Dolch-Keycaps-Keys/4000342794900.html?spm=a2g0s.9042311.0.0.493f63c0O9ucMa
- Gateron Red (x65 for $17.47): https://www.aliexpress.com/item/Gateron-mechanical-keyboard-switch-3-pin-transparent-case-green-brown-blue-red-black-rgb-SMD-switches/33017468389.html?spm=a2g0s.9042311.0.0.493f63c0O9ucMa
- Heat-set inserts (x20 for $5.29): https://www.ebay.es/itm/20pcs-Heat-Set-Schrauben-M3-3mm-M3-0-5-Messing-Gewindemetall-Duroplaste-Insert/402244144367?ssPageName=STRK%3AMEBIDX%3AIT&_trksid=p2057872.m2749.l2649
- Total cost: $47.03
What I already had:
- Soldering iron
- Tin
- 1N4148 Diodes (x64)
- 3D Printer and the PLA necessary.
- Cable
3D Printing the case
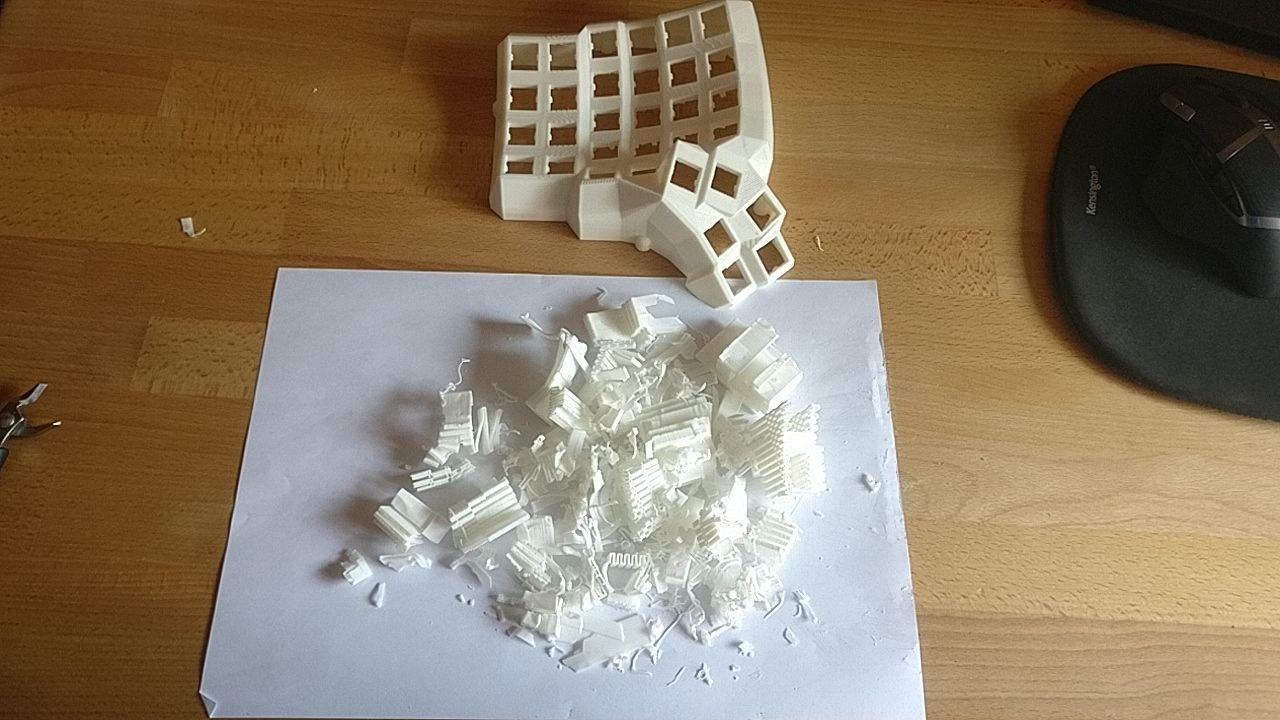
To print the case a Creality CR-10 was used.
The print quality was outstanding, I feared for the central area of each keyboard since they were completely on top of a not very stable support. In the end it turned out fine. Just needed some tweezers to remove the support and filaments hanging.
I used some heat-set inserts to screw the backplate, it was very easy to insert them into the plastic with the help of the soldering iron.
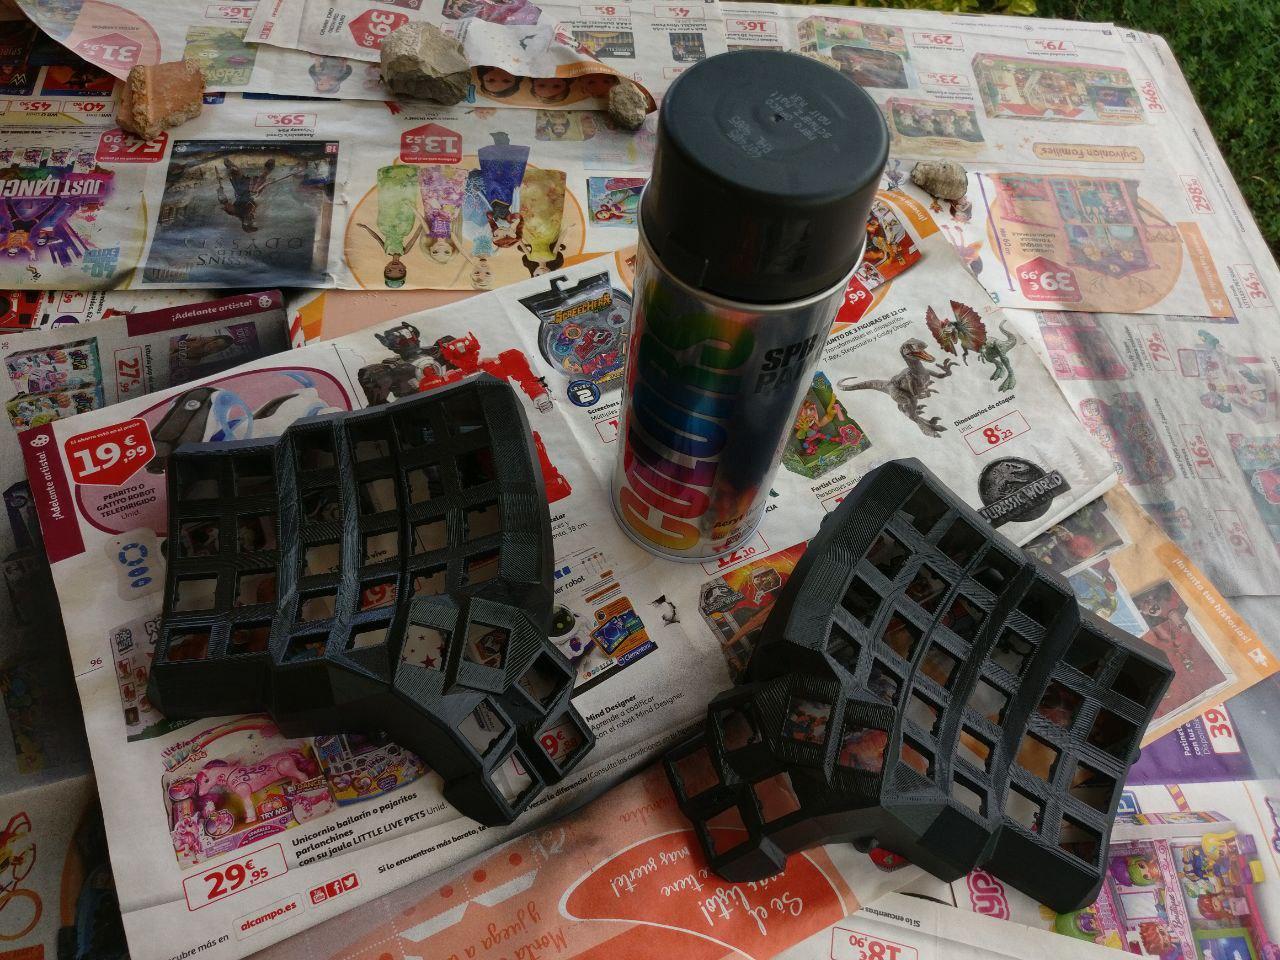
Painting
For the painting I went for a generic primer and a black coat. Thinking that the two coats of primer and other two of black would fill the gaps between layers (this was my first ‘paint job’), I only sanded with a thin sandpaper. The results speak for themselves. But I don’t dislike the result, as it looks handmade.
Switches & keycaps
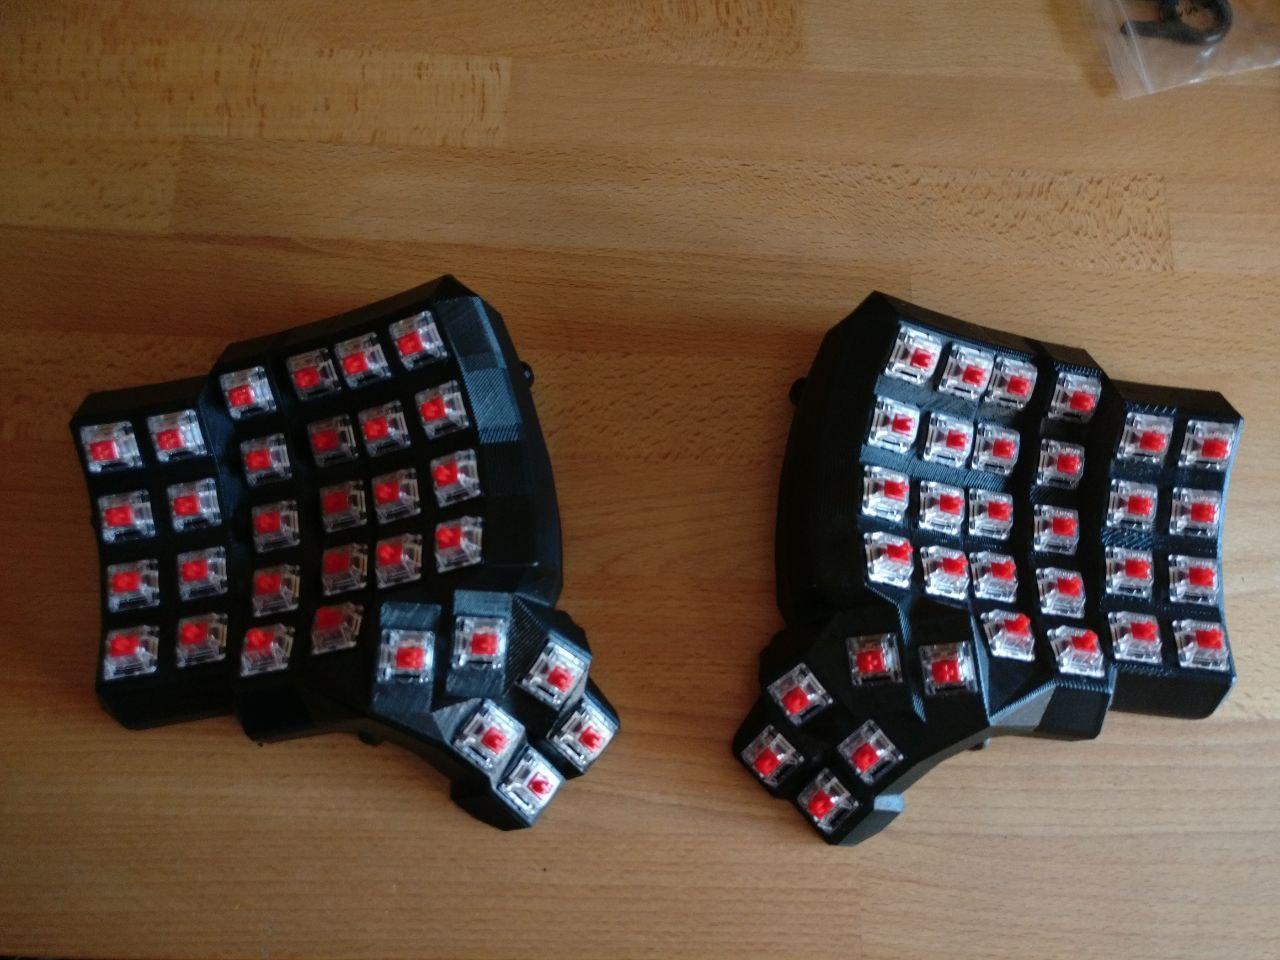
I have a ‘gaming’ (sigh) mechanical keyboard with brown switches. I like those switches, but grew tired of the ’tactile’ feel. So I went for linear red switches from Gateron. They are amazing (and really cheap) and its a pleasure listening to them as you type, maybe from de resonance that the empty enclosure makes.
To install the switches, you push them from the outside until they make a ‘click’ sound. No need to apply hot glue although it’s recommended.
For the keycaps I didn’t go with something fancy, just some normal keycaps for a standard keyboard and without symbols printed on them, as I want to force myself to not look at it.
Soldering
I soldered the keyboard as shown in the original repository https://github.com/tshort/dactyl-keyboard. I used normal cable, so it was a bit tedious having to strip it for every connection.
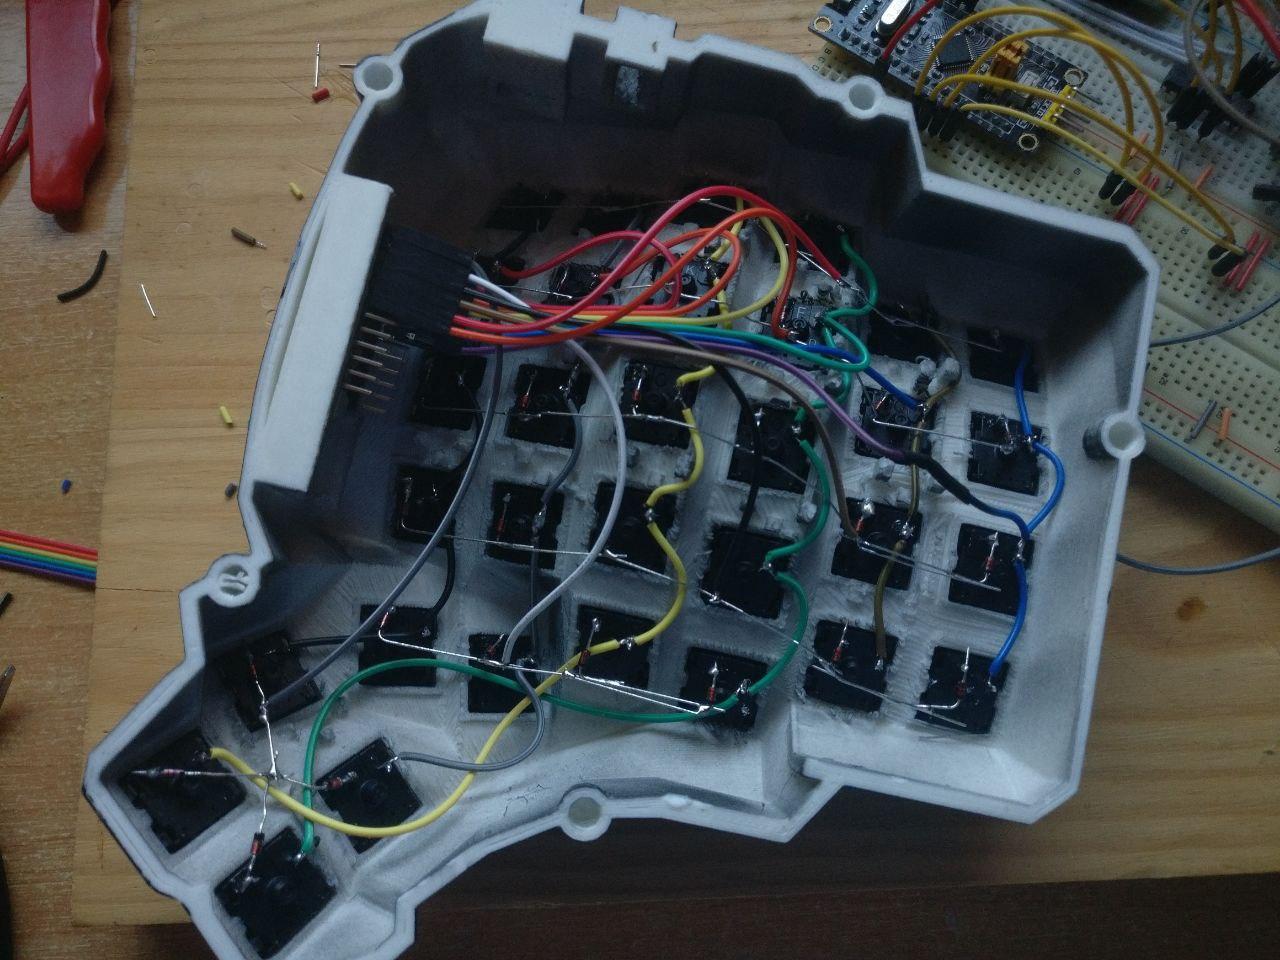
The cables that connect to the Arduinos are stripped jumper wires. This facilitates manipulation as problems most definitely will arise.
One thing to note is that the cables from each side of the RJ-9 connectors are not the same. The right side of my keyboard didn’t work until I noticed that green connected to red and yellow to black (and viceversa).
Compiling and flashing
The firmware provided by tshort didn’t work for me, so I used the official qmk firmware instead: https://github.com/qmk/qmk_firmware
If you plan to make your own custom configuration and/or keymap, it is best to fork the repository and install the qmk helper software:
pip install --user qmk
After that, you want to open a terminal, go to the cloned folder and run
qmk setup
This will clone all submodules and prepare the environment for building the firmware. It also tries to install the required dependencies. For some reason, on Arch it tried to install an old version of avr-gcc (8.1), but it worked fine with the current one (10.1). Once set up, you can create your own config with the following command.
qmk new-keymap -kb handwired/dactyl_manuform/5x6
To compile:
qmk compile -kb handwired/dactyl_manuform/5x6 -km my_config
And finally, flashing it with:
qmk flash -kb handwired/dactyl_manuform/5x6 -km my_config
In order to flash it you have to reset your microcontroller. You could add a reset switch to your keyboard but I chose to manually short RST and GND with two jumpers.
Be careful when connecting and disconnecting the USB to the Arduinos. Their USB connector lack proper support and will break if too much force is applied. I broke the connector of the right hand side just as the firmware was uploaded, but since to change the layout you only have to flash the left hand side there was no problem.
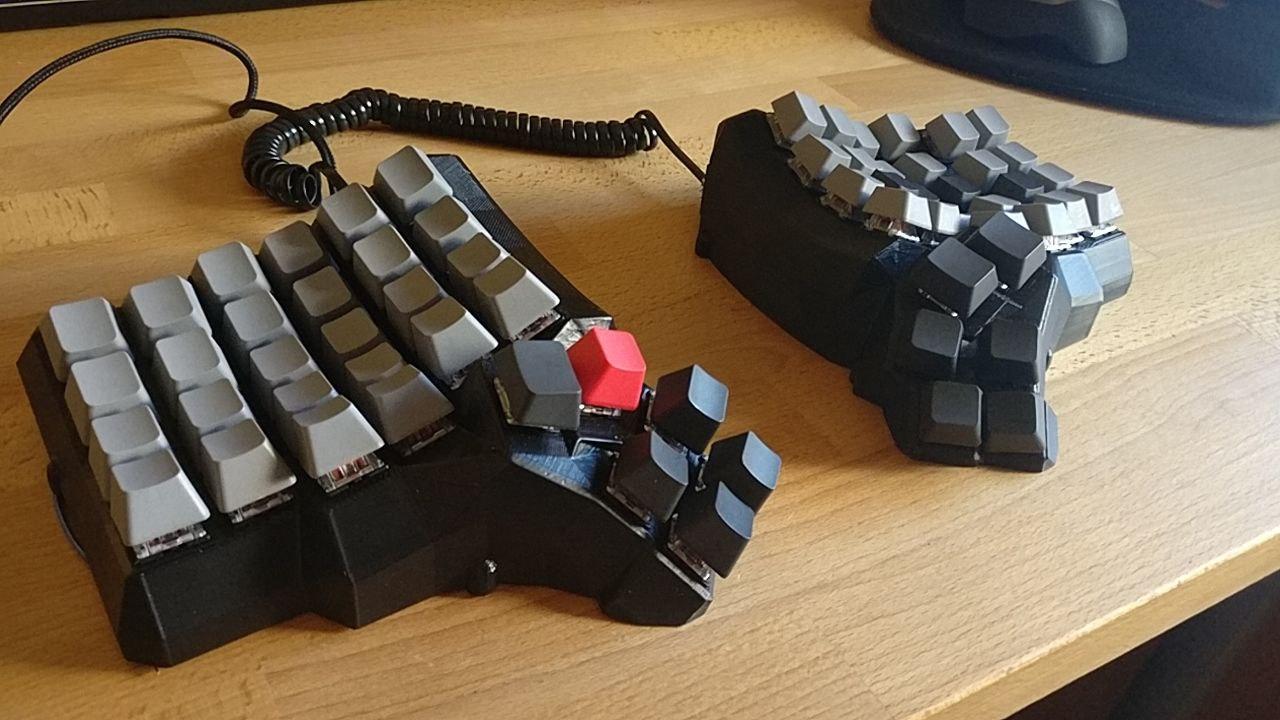
Result
This is the finished thing. It took many hours to complete, and I feel that it will take a lot more hours to master, but I think it’ll be worth it.